

Mounting the monitor
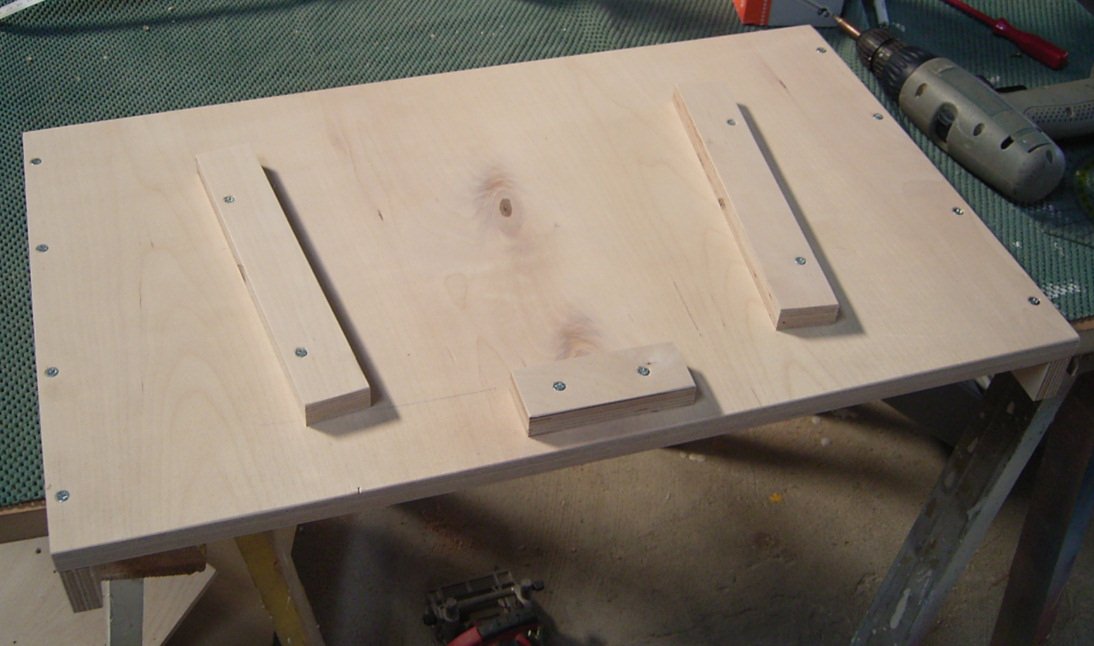
For the fixation of the monitor inside the cabinet, i cut a monitorboard from birch plywood which fits tight between the sides of the cab. Underneath the board, i mount two strips of wood on which the monitor can be screwed to the cabinet. On the top of the board i install three small pieces of wood which hold the monitor in place.
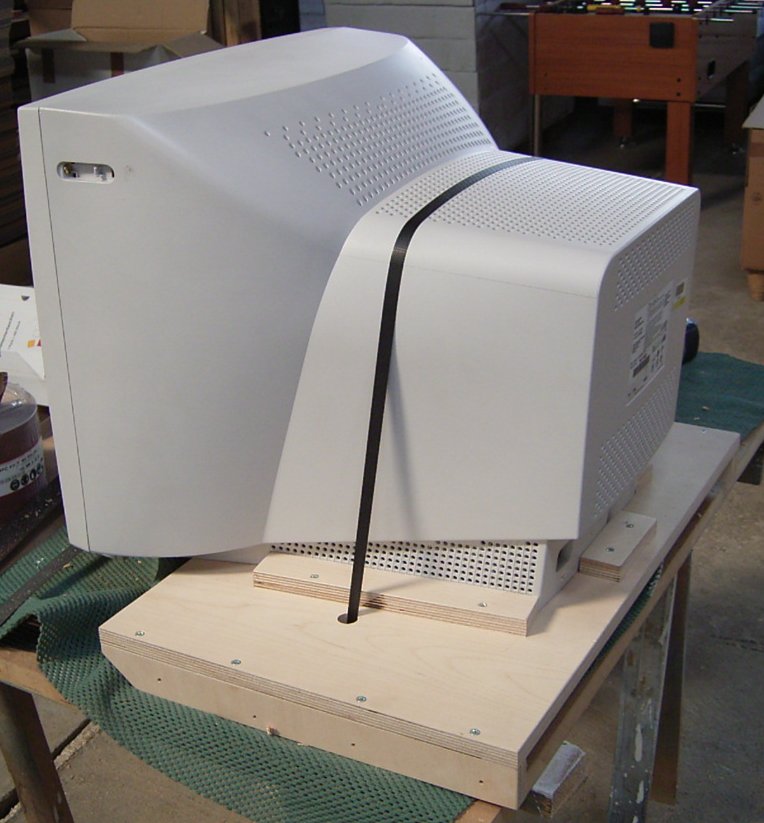
There's no position on the monitor where i could drill a hole and put a bolt or something to attache it to the baseplate, so i had to find a different solution. I drill two holes with a diameter of 1 1/2" into the baseplate and pull a strap around the monitor and through the holes and use a tightener to fix the monitor.
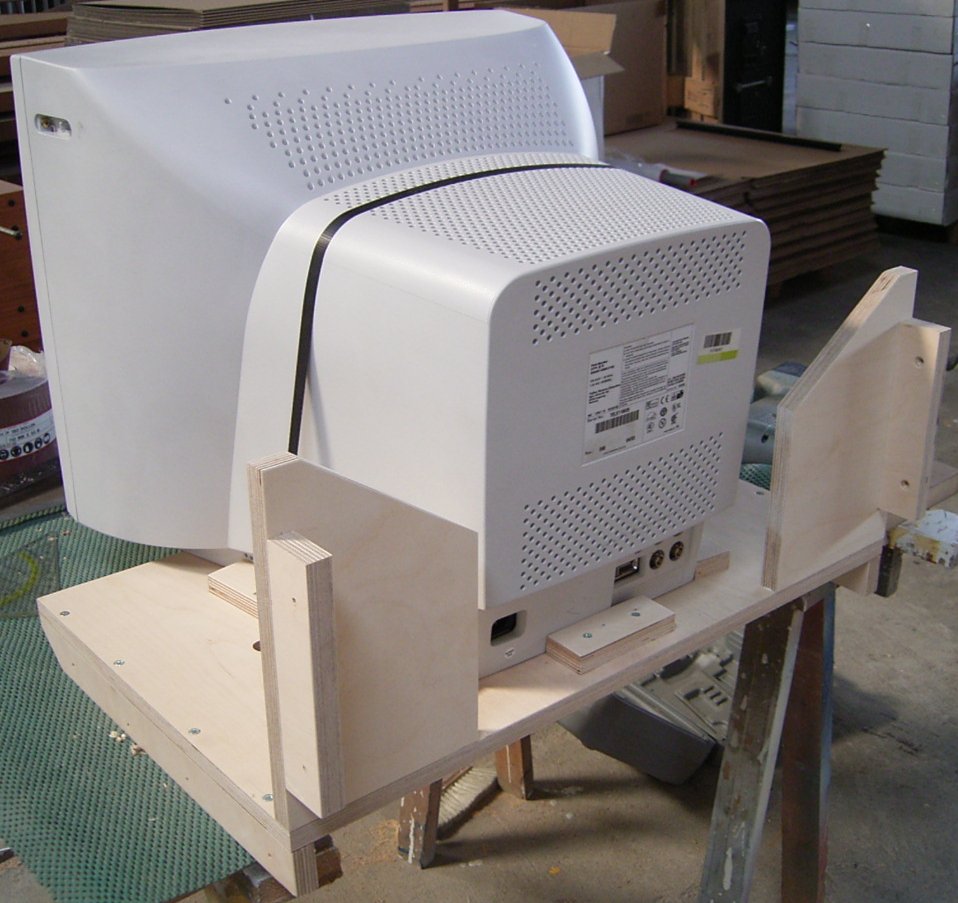
The monitor sits tight in its place. To make the whole construction more stable, i add two brackets to both sides of the baseplate.
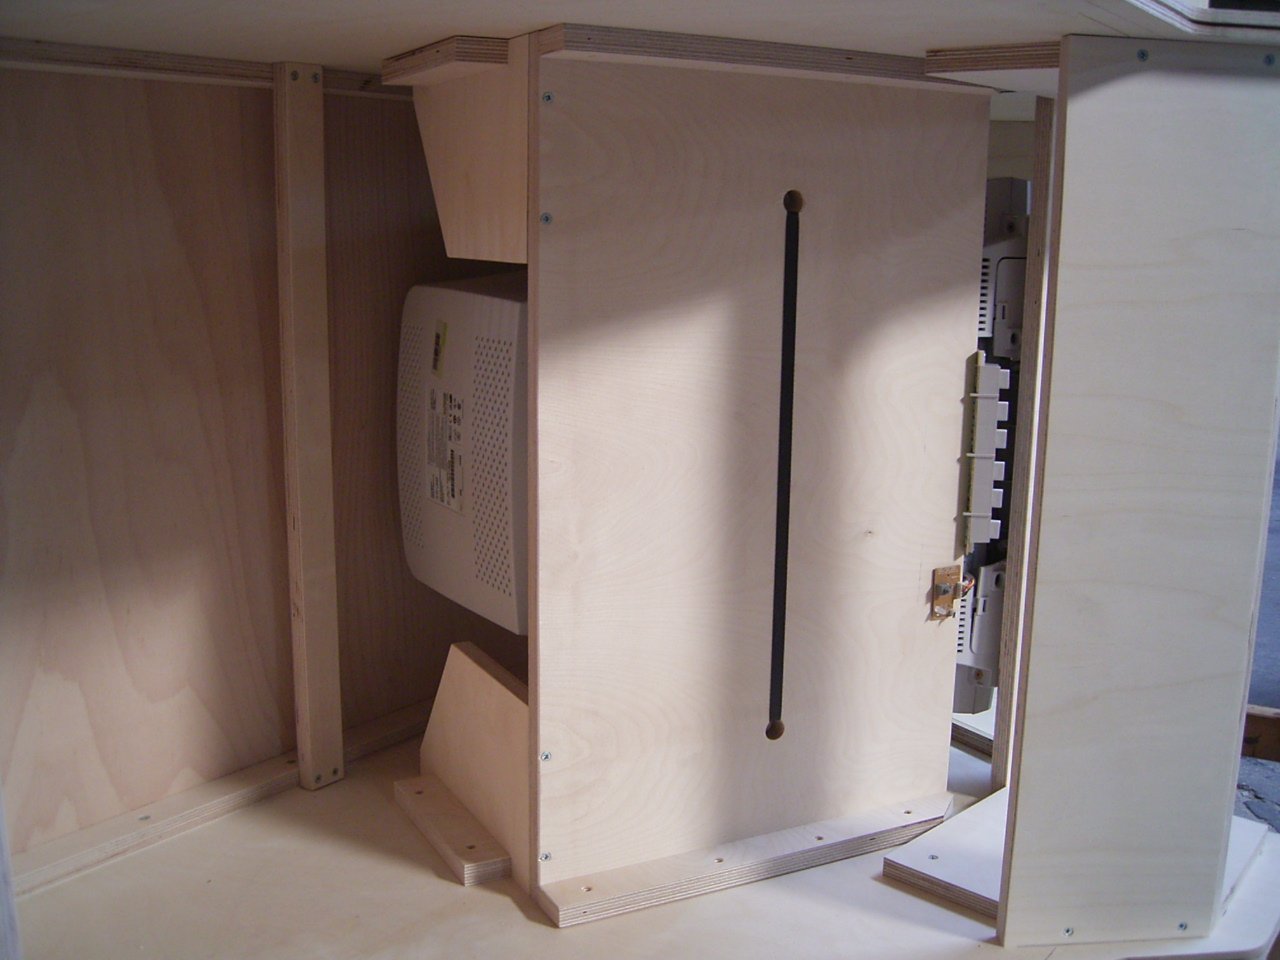
This is how the whole thing looks from below after i placed it inside the cab. On the front edge of the baseplate you can see the monitor controls which can be used when the control panel is removed. In the back of the monitor is enough space for ventilation (i hope).
Next comes the control panel.
Warning: Undefined variable $PHP_SELF in /www/htdocs/w0074465/monitor-2.htm on line 52
Comments
Fatal error: Uncaught Error: Call to undefined function mysql_connect() in /www/htdocs/w0074465/comm/comments.php:30 Stack trace: #0 /www/htdocs/w0074465/monitor-2.htm(52): include() #1 {main} thrown in /www/htdocs/w0074465/comm/comments.php on line 30